How to Enhance Blurry Photos Online Free – 7 Proven Methods
Want to enhance blurry photos online and bring back lost details? You are in the right place. Blurry images happen due to camera shake, wrong focus, or fast motion. These issues make photos look soft and unclear. The good news is that you can fix most blur problems using smart online tools. No complex software needed. Just upload your image and apply the right fixes.
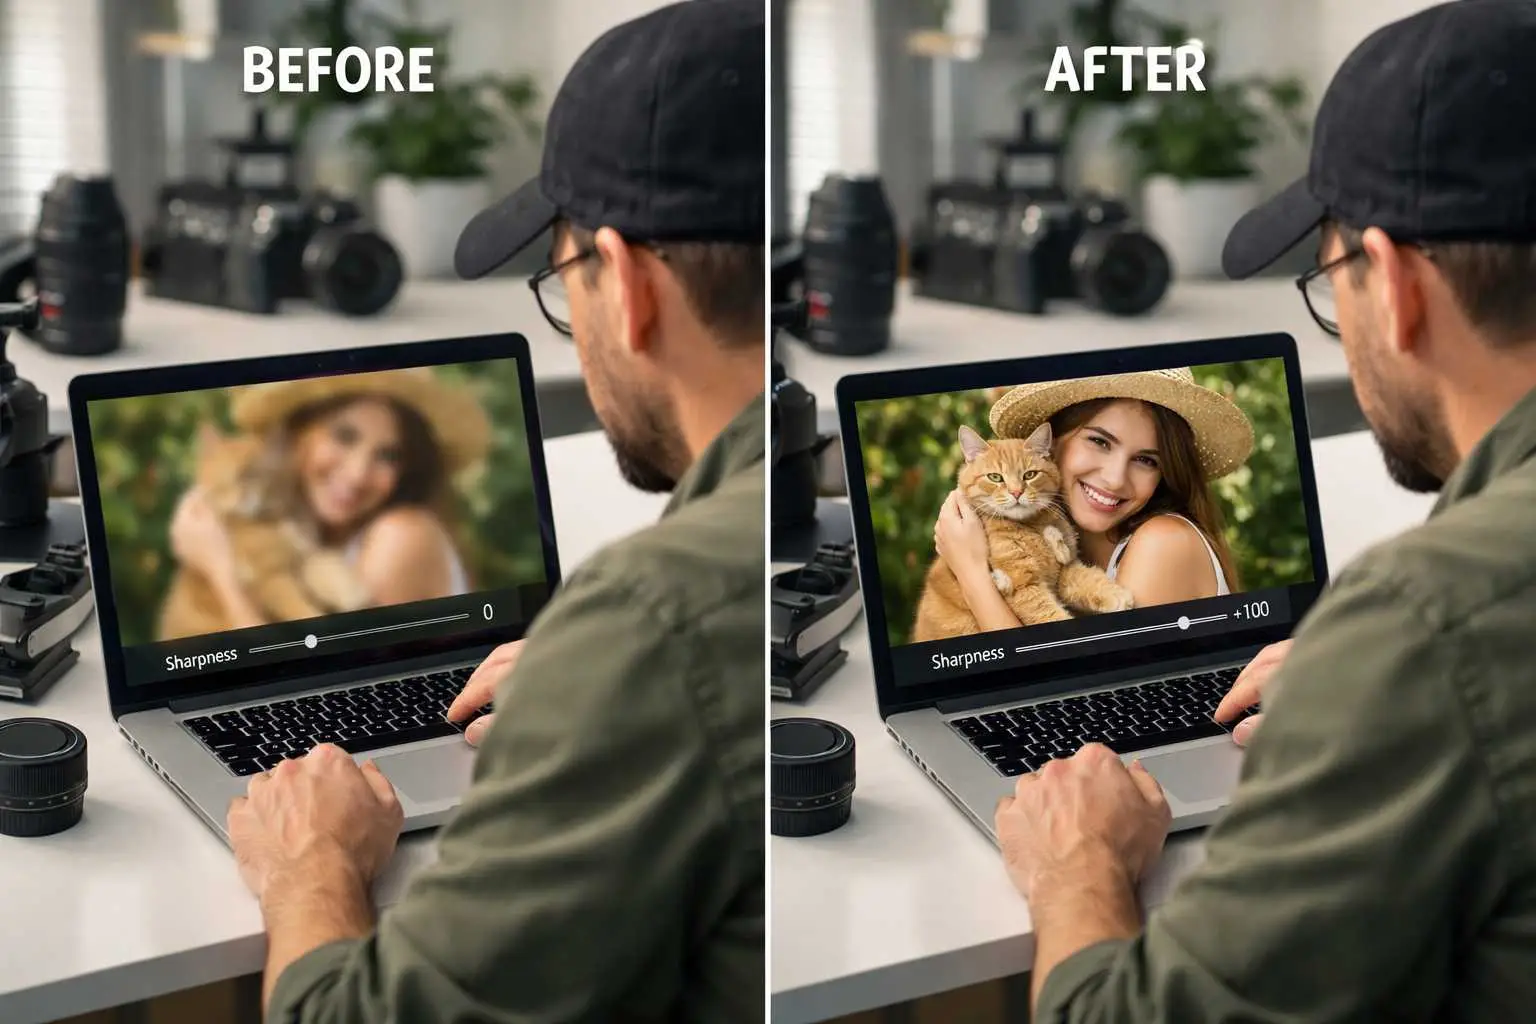
Photo sharpening works by adding contrast to edges in your image. This makes lines and details appear more clear and defined. While no tool can add details that were never there, good sharpening makes soft photos look much better. The trick is to use the right amount. Too little does nothing. Too much creates ugly halos around objects. This guide shows you how to find the sweet spot for your images.
Modern browser tools now offer pro level sharpening for free. According to Adobe research on image quality, proper sharpening can boost perceived detail by up to 40 percent. That is a big jump from one simple edit. You will learn the exact steps to fix blur, what types of blur respond best, and common mistakes to avoid. Let us make your photos sharp again.
Why Do Photos Look Blurry in the First Place
Before fixing blur, it helps to know what caused it. Different blur types need different fixes. Some respond well to sharpening. Others are harder to repair. Knowing the cause helps set fair goals for what you can achieve. It also guides which tools and settings work best for your case.
Camera shake is the most common blur cause. It happens when you move the camera during the shot. This creates a slight motion trail across the whole image. Hand held shots in low light often have this problem. The camera needs more time to gather light, and any small movement shows up as blur. Using a tripod or faster shutter speed prevents this issue.
Focus errors create a different kind of blur. Here, your subject looks soft while other parts may be sharp. This happens when the camera locks focus on the wrong spot. Maybe it chose the wall behind your subject instead of their face. Or you moved after focusing, changing the distance. Focus blur is hard to fix since the detail was never captured at all.
Motion blur affects moving subjects in your frame. A running dog or passing car can appear streaked even if your camera was steady. The subject moved during exposure, creating that stretched look. Faster shutter speeds freeze motion and prevent this. Motion blur is very hard to remove through editing since real detail is missing.
Low quality or small images also look soft when viewed large. Photos from old phones, heavy web compression, or tiny thumbnails lack enough pixels for sharp display. Enlarging them just makes things worse. While sharpening helps a bit, you cannot create detail from nothing. Consider using our image resize tool to scale images properly before editing.
What Results Can You Expect from Blur Fixes
Let us be honest about what sharpening can and cannot do. Setting the right goals prevents wasted time and frustration. Some photos improve a lot with simple edits. Others are beyond saving no matter what tools you use. Knowing the difference helps you focus effort where it matters most.
Mild blur from slight focus miss or camera shake responds best. These images have soft edges but still contain basic detail structure. Sharpening can make them look much better. Photos that look okay as thumbnails but soft when zoomed in are great candidates. A few slider moves can transform them into usable images for web or print.
Very blurry photos with no sharp areas anywhere resist most fixes. If you cannot make out basic shapes or edges, sharpening will not help much. The tool needs some edge data to enhance. When everything is a soft blob, there is nothing to work with. Aggressive sharpening just adds noise and ugly artifacts to an already bad image.
Motion blur with long streaks rarely fixes well through basic tools. The detail was smeared across multiple pixels during capture. Simple sharpening cannot untangle this mess. Special AI tools exist for motion blur but results vary widely. For most users, preventing motion blur during shooting beats trying to fix it later.
Compressed or low resolution images have hard limits too. Once detail is lost to JPEG artifacts or tiny size, it is gone forever. Sharpening can make edges slightly crisper but cannot invent new detail. These images often look worse with heavy sharpening since it brings out the compression noise. Light touch ups work better here.
Step by Step Guide to Sharpen Your Photos Online
Now let us get practical. Follow these steps to sharpen your blurry photos using free online tools. The process is simple but the order matters. Doing things in the right sequence gives better results. Take your time with each step rather than rushing to the end.
First, upload your image to a quality enhancement tool. Our AI photo enhancer processes files right in your browser. No uploads to outside servers means your photos stay private. Drag and drop your image or click to browse your files. Wait for the full image to load before starting edits. Check that it looks correct at normal size.
Next, zoom in to check current quality closely. Look at your image at full size or 100 percent zoom. This shows the true level of blur without any scaling tricks. Note which areas are soft and which have some detail. This tells you how much improvement is possible. Images with visible edge structure respond better to fixes.
Try auto enhance first for quick baseline results. One click applies balanced fixes across brightness, contrast, colors, and sharpness together. This gives a good starting point without manual work. Check if the auto result looks better. For many images, auto mode does most of the heavy lifting and saves you time.
Then adjust sharpness using the manual slider carefully. Start at low values around 25 to 35 percent. Look at your image while moving the slider slowly. Watch for bright lines appearing around dark edges. These halos mean you went too far. Back off until edges look crisp but natural. Most photos need less sharpening than you might think.
Add clarity to boost texture and depth in your shot. Clarity works on midtones rather than all edges like sharpening does. It brings out surface details in skin, fabric, wood, and other textures. Values of 20 to 30 percent work well for most images. Combined with moderate sharpening, clarity creates a polished look without obvious processing.
Finally, compare your result with the original image side by side. Most good tools offer a before and after view. Slide between versions to see the change clearly. Make sure the edit looks natural at normal viewing size. Artifacts that show up only when zoomed way in usually do not matter for typical use.
Using Clarity and Contrast for Better Results
Sharpness alone does not fix every blur problem. Other tools help create the look of a clearer image too. Clarity and contrast work in different ways than sharpening. Using them together produces results better than any single tool alone. Think of them as teammates working toward the same goal.
Clarity targets local contrast in the middle tones of your image. This brings out texture without making the whole image harsh. Fabric weaves, skin pores, tree bark, and stone surfaces all pop more with clarity. It adds a three dimensional feel that flat images lack. Start with values around 20 percent and adjust based on what you see.
Contrast affects the whole image from dark to light areas. Raising contrast makes darks darker and lights lighter at the same time. This adds punch and impact to flat looking photos. It also helps separate subjects from backgrounds more clearly. According to Adobe's editing guides, combining contrast with sharpening creates stronger visual impact.
Brightness fixes help when working with dark photos that look soft. Shadow areas contain less visible detail than well lit areas. Raising brightness slightly reveals more edges for sharpening to enhance. But go easy since brightening also shows more noise. Find the balance where you see more detail without too much grain showing up.
Color saturation can make sharp images pop even more. When colors look dull, the whole image feels less crisp somehow. A small boost of 10 to 15 percent adds life without looking fake. This works well with landscape and product photos especially. Just avoid pushing skin tones into unnatural orange territory on portraits.
Common Mistakes to Avoid When Fixing Blur
Even simple tools can produce bad results with wrong technique. Knowing common errors helps you avoid them from the start. Most mistakes come from using too much of a good thing. Restraint often beats aggressive editing when it comes to sharpening. Less really is more in many cases.
The biggest mistake is adding too much sharpening too fast. This creates bright halos around dark edges that scream fake editing. Once you see these glowing outlines, you have gone way too far. Back the slider down until they fade away. A sharp looking image should not look processed or artificial when viewed normally.
Another error is judging results only from zoomed out views. Thumbnails hide problems that show up at full size. Always check at 100 percent zoom before deciding you are done. What looks fine small may have ugly artifacts when viewed large. Print and high resolution displays reveal every flaw in your editing.
Sharpening noisy images without care makes things worse fast. High ISO shots and low light photos contain grain that sharpening loves to enhance. The result is a grainy mess that looked better before editing. Either reduce noise first or use very light sharpening on these images. Accept that some quality limits exist.
Applying the same settings to every image skips important differences. Each photo has unique needs based on its content and problems. A portrait needs different handling than a landscape or product shot. Take a minute to evaluate each image before editing. What worked great last time may not suit this particular photo at all.
Saving as low quality JPEG after editing ruins your hard work. Compression throws away fine details you just worked to enhance. Use PNG for best quality or high quality JPEG at 85 percent or above. Our image format converter helps you choose the right output format for your needs.
Preventing Blur is Better Than Fixing It Later
The best blur fix is not needing one at all. Good shooting habits create sharp images from the start. Even basic cameras can produce crisp results with proper technique. Learning these skills saves editing time and gives better final quality. Prevention beats repair every single time.
Use fast enough shutter speeds to freeze your subject and your hands. A basic rule matches shutter speed to lens length. If using a 50mm lens, shoot at least 1/50 second or faster. For 200mm, use 1/200 or faster. This stops camera shake from ruining your shots. Modern cameras with stabilization let you go two to four stops slower.
Proper focus technique ensures your subject actually gets sharp. Use single point focus mode and place that point right on your subject. Then hold still while pressing the shutter fully. Moving after focus locks changes the distance and ruins sharpness. For moving subjects, continuous focus tracks them as they go.
Good lighting enables faster shutter speeds without quality loss. Bright conditions let you use quick shutter times that freeze motion. In dim settings, consider adding flash or moving near windows. Higher ISO also helps but adds noise. Finding the right balance takes practice but pays off in sharper images.
Steady support makes a huge difference for any camera. Tripods give perfect stability for still subjects and long exposures. For handheld shots, brace your elbows against your body and breathe out when shooting. Some photographers lean against walls or set cameras on solid surfaces. Any extra stability shows in sharper final results.
Choosing the Right Tool for Your Needs
Many tools exist for fixing blurry photos online. They differ in features, ease of use, and results quality. Picking the right one for your situation saves time and frustration. Consider what you need before jumping into a random tool. The best choice depends on your images and skill level.
General enhancement tools handle most blur fixing needs well. Our photo enhancement tool combines sharpening with clarity, contrast, brightness, and color controls. One place for all common fixes. Auto mode works great for quick results. Manual sliders let you fine tune anything that needs more work. Perfect for casual users wanting simple solutions.
Dedicated sharpening software offers more advanced controls for pros. Features like radius, threshold, and masking give precise control over how sharpening applies. These matter for large prints or demanding uses where every pixel counts. But the learning curve is steeper. Most casual users find these extras more confusing than helpful.
Mobile apps let you edit photos right on your phone or tablet. Our browser based tools work great on mobile too without any app install. You can fix blur wherever you are using the same device that took the photo. Touch controls feel natural for slider adjustments. Quick edits and shares become easy from anywhere.
For working with many images at once, batch tools save huge amounts of time. Apply the same settings across dozens or hundreds of photos automatically. This works when images have similar problems needing similar fixes. Our current tool handles one image at a time but produces excellent results for focused editing sessions.
After enhancing your photos, you might need to create documents from them. Our image to PDF converter combines multiple images into one file. You can also use our blur tool for creative effects where softness is actually the goal.
Frequently Asked Questions
Yes, you can improve most soft photos using free online tools. Sharpening and clarity controls make edges more defined. Mild blur from slight focus miss or camera shake fixes well. Very blurry images with no detail left are harder to save. But many photos that look too soft become usable after proper editing.
Several things cause blur. Camera shake happens when you move during the shot. Focus errors put the wrong area sharp. Motion blur affects fast moving subjects. Low resolution or heavy compression makes images soft too. Each type needs different handling. Some fix easier than others through editing.
Good sharpening can boost perceived detail by 30 to 40 percent on suitable images. Photos that look okay small but soft when zoomed respond best. The tool works with existing edge data to make it pop more. It cannot create detail from nothing. Very blurry images stay blurry no matter how much you sharpen.
Sharpness adds contrast to all edges in your image. This makes lines between light and dark areas more defined. Clarity targets midtone contrast only. It brings out texture and surface detail without harsh edge effects. Using both together gives better results than either one alone. Most images need moderate amounts of each.
Start with low slider values around 25 to 35 percent. Increase slowly while watching for problems. Bright halos around edges mean too much sharpening. Back off until they fade. Always check at full zoom size not just thumbnails. Compare to the original often. When in doubt, use less rather than more.
Apply sharpening last in your editing workflow. Fix brightness, contrast, and colors first. This way sharpening works on your final tones. It also avoids boosting noise that other adjustments might add. Auto enhance applies all fixes in the right order for you. Manual editing should follow the same pattern.
Yes, browser based tools work great on phones and tablets. No app install needed. Upload from your camera roll and edit right away. Touch controls work well for slider adjustments. You can sharpen photos anywhere with an internet connection. Results match what you get on desktop computers.
Sharpening boosts noise along with real edges. High ISO shots and dark photos contain grain that gets enhanced too. The tool cannot tell noise from detail. Use lighter sharpening on noisy images. Or apply noise reduction before sharpening. Some grain is unavoidable on these types of photos.
PNG format saves every detail without any loss from compression. Use it for important images or further editing later. JPEG works fine too at quality 85 percent or higher. Lower quality JPEG adds artifacts that hurt your sharp edits. Choose format based on how you plan to use the final image.
Prevention always beats repair. Sharp originals look better than fixed blurry ones. Use fast shutter speeds, proper focus, good light, and steady support. These basics create crisp shots that need minimal editing. Fixing blur is useful but cannot match the quality of getting it right when shooting.